Saturday, December 20, 2008

Batteries Are Heavy

I'm not sure if the batteries won or if I did, but the batteries are in the car and my back is in pain. It's better, but was a bit sore for a day or so. 

Anyhow you can see here I got the batteries in their respective positions, and the best news is that the ones in the back battery box I built actually FIT! You can do all the measuring you want, and still feel reasonably confident that you did the measuring correctly. But until it's time to put the pieces together, it seems like anything could go wrong.

I am replacing all of the light bulbs since I am also switching over to 12volts, as it was originally a 6 volt system. So I replaced the headlights, and while I was at it I swapped out the old headlight rings for new ones and installed the "eyebrows" just cuz. Makes the car look stoned. Or sleepy. Looked as if the parking lights in the headlight housing had not been used in years, as the connecting wires to them had been cut and wrapped up. So put in new parking lights and hooked them up. Also had to get new headlight springs, as the old ones had rusted so much, they didn't have much spring left in them. These are more like clips that work with a spring like action to hold the sealed bulbs in place, and also the assembly to the headlight ring. Also added new rubber seals from body to headlight.

Then went through the process of replacing the rubber seals and bulbs for the front turn signal indicator lights. These little deals are more involved than you would think. Not just a seal, but under the signal the seal holds the wire that connects the light inside a rubber tube that seals to the chassis. So I had to remove the light assembly (no easy feet, lots of rust and had to break two nuts off of the screws, drill out the screws and install new ones) then rethread the old wire (after cutting off the spade connector), and install a new new spade connector on it in order to attach it back to the assembly. Just more time consuming than I expected. The seals on the back turn signal lights look a lot easier since there is no rubber hose portion to it. I pulled off the passenger side back signal housing today only to find that the bold holding it in is rusted and stripped from the top. Looks like more extra work, but I'll save that for after xmas.

Below are all of the cables I finished making today that will connect the batteries. I have the front battery connectors installed, just need to get the back seat box batteries connected, and then connect the packs to the system. After double checking my wiring of course.

Happy holidays.

Sunday, November 30, 2008

Rugalicious

Lots done over the long Tgiving weekend. My hands hurt.

Check out the rug...


Ran some wiring from the charger (which I placed under the back seat) to run up to the front of the bug. I have the charger plug set into the passenger side horn grill (since there's no horn on that side, just the grill.) I still have to shoot a picture of that one. It's a part I got from an RV parts online store. 

Anyhow, after laying down the wiring, I went to work on the rug. Used up a whole can of contact cement, and I've been dizzy ever since. Brushing contact cement is one of those jobs you can't really get done fast enough. The reward is nice, and feels like yer making progress, but those moments you have where you are staring at the cement brushing onto the back of the carpet, watching it dry (don't put it down until it's 'tacky'!) seem to be the longest moments. Those moments that allow you to reflect "What the hell was I thinking...?"

Anyhow, looks good now. Check out the back seat.

You can see the box behind it. The battery box that is. Yes, got it fitted in on TGiving, in between making a pumpkin pie, vegan stuffing (brown rice, celery, mushroom, cashews, macadamias, vegan sausage, dill seed, and fresh dill mixed in at the end, yum), potatoes with garlic and painting the rims. You see what I mean about how little time I have?


Here's the rims...speaking of painting them...


They need a few coats of clear coat. Doing that this week and taking them to git tires put on. Then I'll try painting on the white wall. Got a special paint for that.

Had a friend who runs the Lucky JuJu pinball palace (check out http://www.ujuju.com) who is an electrical engineer type stop by to inspect some wiring and schematics. Had to figure out had which lines off of the old wire harness to use to incorporate into the new system. Figured it out, and got some tips on wire gauge and how to run the wires thru the comp board. Good stuff.

Expecting batteries this week...I still have to secure the front battery area. Back box is obviously ready to go. 

My daughter told me today that I'll have the car finished before she is 6. That happens on Dec. 31. I hope so.

Oh, here's the old throttle spring I incorporated into the potbox....


Tuesday, November 25, 2008

Some interior, some wheels, some injuries...

Okay, since the motor was installed, and the component board installed, I've done some wiring to almost complete that part of the job. I had to install the potbox (the box that is the go-between from the throttle pedal to the controller), and once that was in I could put the connections from that onto everything else on the board. 

If it seems that I'm repeating myself, it's because I rarely read what I've written previously. Plus, I'm super tired.

So I had my rims sandblasted, but here's how they looked before that.

Pretty bad. So then I had them sandblasted, and then I treated them with the POR 15 pre painting chemicals (1st chemical, wash off with water, 2nd chemical, wash off with water).


Then I primered them with the grey POR 15 paint.

I hope to do the final painting this weekend. I have the stock colors in some rattle cans, plus some clear coat. Doing the two tone deal, with the anthracite (grey) on the outside of the rim, and ruby red on the inside. 

So here's a story for the truly bored: My next step was to get the battery box installed, which was going into the luggage area (behind the back seat.). I've already measure and drilled holes for the install, including the stainless steel 1/8 inch hold straps I made to hold the top of the box down. But back in that area there will be carpet. So my first thought was that I'd just lay down the carpet in the middle of the luggage area, and do the rest of the carpet later.

Nope.

There's a very specific order in which to do the interior, and before I lay down and glue the luggage area carpet, I have to install the carpet that goes over the wheel well area. Okay, not too big of a deal.

Oh wait. 

Before I install the wheel well carpet, I have to have the headliner (the perforated vinyl wrap that goes over the walls/ceiling/interior of the car) installed, because the bottom of the headliner is glued to the wheel well area, and the wheel well rug is glued over the headliner.

Hell.

Looks like I'm doing the headliner. At least part of it. Here's how the luggage area looked before any headliner or carpet. All I've laid down is the silver shiny deamplifier material to deaden the sound and help insulate the car.


So to start the headliner, I have to start on the B pillars (the vertical pillars in the middle of the car, where the doors lock to the car.)

I realize that the deamplifier silver stuff looks a lot like dryer duct tape, or plain ol duct tape. It has a tar like substance underneath it, and it's a nice pliable material, that is very easy to work with. I'm really looking forward to experiencing the affect it will have on the noise level. Not that I'll have a loud motor (like the VWs normally have), but it should make for a quiet cabin. I don't have plans for a stereo yet, but do plan on doing something eventually.

The other 'ghetto' looking item you may notice in the photo is the under carpet material there in the panel area. Behind that there is some deamplifier stuck to the body, but there was still space, so I had picked up some of this carpet padding, just a scrap of it for free at a carpet store, for this very purpose. I wanted to insulate this area. Anyhow, on to the next photo of more headliner.


The headliner on the ceiling is the old stuff...haven't done that part yet. Just look at the wall above door stuff. 

Proud of my folds on the area above the drive side window. Wow, I can't believe I wrote that sentence. This project is truly putting me into a weird bubble.

And the back. You can't see the part I goofed up back there, and I'm not telling where it is. Wheel well rug is in too, you can sort of see it, as well as the two 2/0 wire coming in for the battery pack. As I thought about the project after working most of the day on Sunday, I think I have to find new areas for that wire to enter the cabin. In fact, yeah, those holes won't work. What the hell was I thinking.

Trying to do this, while also trying to fit in work time, and hanging out with the family time is really challenging. Both kids want to help so much, but it's not like I can give them the wire strippers and tell them to go for it. Basically I have to completely work out the small tasks I need to do, way in advance of heading out to do it. And I have to know exactly what I'll be doing and how. If I have to improvise something, or make a decision on the design, while also knowing I have to go inside soon to make a sandwich for someone, or get someone down for a nap, I'm probably gonna make a mistake. That's what happened here. 

On Sunday I let me 3 yr old 'help' by holding my iphone. He mostly watched Super Friends on YouTube, but then he discovered the camera, and how to take pictures. He took some great ones, actually, and here's one he got of me...


At the end of the day on Sunday, I finally fit my battery box into the luggage area. Guess what? Now it doesn't fit. F#*@&*@! Is similar to what I said when I realized this. Mostly because that was the goal I had for the day: to fit the battery box into that back area. Well now I'll have to cut away some of the rug that won't be visible when the box is installed, and it should fit fine. I'm very happy that I have not glued any of the big rug piece, just the wheel well rug, and I probably won't have to remove a lot of that. 

A new feature: INURY UPDATE:

My fingertips are really sore, and I had to cancel out on a music rehearsal. Couldn't play guitar at all, and I was supposed to play standup bass for this thing. Not. A. Chance.

New cuts. Almost every cuticle has a deep cut that is irritated when I put my hands in my pockets. But the one I got from my japanese saw (from fitting the supports on the bottom of the battery box), has healed up nicely. I was sure it would scar, as the skin didn't want to join back together. Neosporin really helped out on that one.

My chiropractor thinks I'm nuts, cuz every time I come in I have a new car related issue. This time it will be lower back, on both sides, from reaching around into the back cabin area, thur the rear window, and the other hand reaching up under the back window area in order to try to blindly secure a nut onto a bolt pushing in from the interior. This took WAY too much time on Sunday, and my back hates me for it.

Unrelated to the car, but foot has decided to start hating on me. The bridge of my right foot doesn't like it when I walk. Standing: ok. Walking: bad. Very bad. I'm icing it every night, and nothing is helping. Might have to see the chiropractor early to see if she can help with this one. So because I'm limping, now my hip joint is barking.

Did I mention the rotator cuff/bursitus in my right shoulder. I can't really lift anything heavy, or throw anything or I collapse in a pile of throbbing, aching muscle goo.

Can't wait to start back on the car after thanksgiving.

Tuesday, November 11, 2008

Motor is IN!


took the day off (it was a holiday, officially) and managed to get the motor mounted today. A friend of mine help me scribe the plate on the bell housing (he used a dental pick!) I never would have thought of that. I tried a sharpie, and it just wasn't working out. He scribed it and cut it (I didn't think my collection of saws would do the trick.) I got it back last night, and then drilled the four mounting holes. My pal loaned me these center punch pins, not sure of the real name. They fit into the mounting holes in the bell housing, then I clamped the plate onto the bell housing, and then tapped the pins from the back, which punched a small hole into the aluminum adaptor plate to give me a center point to drill into.

Hooray for the center point!

Anyhow, I then used my drill press to make the holes. Drill press was great, cuz I didn't have to do pilot holes; just clamp and drill. As I probably mentioned, I'm a wood guy, not a metal guy, so I'm not too familiar with using metal as a material to drill and assemble. Aluminum is a very strange material. On one hand it's like a soft wood. When you drill it, it's a fairly easy, satisfying feeling to pull the drill bit down into it. But then it gets soft, gooey, and a bit like soft plastic or something. But then, the final result always looks sharp. 

Okay, so here are some photos of the adaptor plate, the motor, with spacers on top of it, and then the motor mounted into the car.

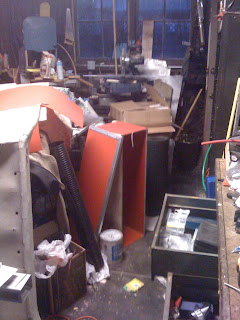
Now have a look at my garage (shop). It's such a crazy mess. Someone, come over and clean this up. You can sort of see the battery box and component board in the background in one of these.

My strategy now is to finish all electrical stuff before getting back into the restoration stuff. The only caveat in this approach is that before I finish the battery box (the one behind the back seat) installation, I'll have to put in the insulation and carpet before it's done. Sort of backwards, as far as the interior goes, but that part of the carpet, I think, I can put in before dealing with the headliner.

Below is the volt meter. I just picked up a couple of gauge brackets locally to install these under the dash. That's the next step. 


Sunday, November 9, 2008

More Progress...old pics and new...


Okay, there's been good amount of progress. First pics showing the POR15 paint job I did on the interior, painting over the welded patch of floor pan, and various parts of the floor pan. The POR (paint over rust)15 is this noxious paint, that turns into a hard shell after painting (and using the prep products as well). But it keeps the rust away and gives a nice glossy finish. I got this in some strange places (face, inner thigh, back of knee...i have no idea.) I painted the e-brake boot as well. It's the original and was pretty stained up, so I tried using the POR on it. Turned out pretty well.


And here we have the same areas after we laid down some sound dampening material. Got it at SecondSkinAudio from Arizona. When I say we, I mean me, my dad and my kids. They enjoyed using the rollers on the material to help stick it to the floors/walls. When it's time to put the carpet in, I'll put a layer of heat insulation on top of this stuff which should allow for some cushioning as well.

At this point i'm feeling WAY too lazy to match up my text with the pictures. I've been writing html for over 10 years, and the blogger interface makes it pretty hard to get this to work correctly.


Anyhow, you'll also see my first succesfully created 2/0 connector wire. That's the big thick wire with fat connectors on the end. There's a photo of the 2/0 wire cutters, along with the crimping tool and a small cut of the 2 ought gauge wire. That crimping tool needs more than a standard hammer. I could crimp succesfully by slugging it with a 3 lb sledge hammer, about 5-6 times. When that was waking my son during naptime, I switched to the more passive vise. I liked the vise better. I just put that entire crimping tool in the vise with the wire and connector and crimped it right down. Then put the heatshrink tubing over the connection, and shrunk it down. It's quite the heavy duty heat shrink, and becomes about 1/8" thick once shrunk down.


You'll also see the test battery boxes made from cardboard to get the best idea for a box fit. We went thru a few different ideas with cardboard until I settled on the red one you see.  It's made of plywood, but then I glued thin sheets of polyethylene plastic around it to protect the box from potential water spillage/battery acid.

You'll see the front area here, where the gas tank used to be, and then my test cardboard boxes to see if the batteries would fit. It looks like the middle battery would be too high, but we put the bonnet back on (hood, but on a VW it's a trunk), and check the height. Plenty of room.


There's the area under the deck lid in back, where you can see the transmission, and then the 4 brackets I made for my component board. Then there's a photo of the board setting on those brackets. And then another one of the board, mostly wired up, sitting in there again. Today I got the final 2/0 wiring done on the board, but there's no pic of that yet. I also installed the pot box just above the component board. Then I ran 6 lines of 14 gauge wire from the component board area, thru the passenger area up to the hood area, mostly for the meters, but 2 extra, in case i need them. 

The discerning reader will notice that the components have been moved around a bit since I wired them. 

You may notice the 2/0 wire that's housed inside the clear pvc tubing, it runs under the car. Pops up into the hood area, and back into the deck lid area. Before I put the sound dampening material on the floor, we had run some small nuts/bolts thru the floor to attach some supports that hold the 2/0 under the car at about every 15" or so. 

Also, how's that re-upholstered front seat look? There's two of them done, and I still have to do the back bench seat. 

I got the carpet, carpet glue and headliner. Not sure when I'll start that. I think I'll go for finishing all the electric insides first, and then get into finishing the interior. I still have to bleed the brakes with new fluid and add tranny fluid (yes, 'tranny fluid'). 

I also have to re-do the doors. I have all the door rubber, etc, but again, I'll save it until I get it running with the electric gear.

Last picture there is the sad state of rims/tires. I'll be taking them to get the tires pulled off this week (tires are bad), and get the rims sandblasted. Then I'll pain the rims, get some new tires put on and I plan on painting on the white walls. I'll try that, with the Ranger paint I got, which was designed for tires. We'll see how it works. Being that it's an electric car, I couldn't use the non-radial tires, and white walls only come in the bias tires. 

Hopefully next week we get the adaptor plate on and attach the motor...

Friday, October 10, 2008

Some pictures, yo~!

Here's some pics...all before I did any rust work...the after pics coming in a day or two
Here's the big hole in the passenger side floor pan. This is the area between the underside of the back seat, and the passenger seat. Same old story: battery acid leaked out from the area under the back seat, and got under the tar board...sat and sat and sat and sat...no one could really see the rust under the tar board. I ended up cutting out a larger area to rid the old rusted out part of the pan, to get to solid material to weld to. 
.

Here's the passenger side rear shocks I put in. Coil overs (it still had the original shocks!) to support the extra 150lbs or so that will be in the car.


Here's one of the front shocks in there - these were quite difficult to get in there. Had to use a 2nd floor jack to compress the shock to get it in there. Is there a better way? Probably, but I did it this way...


Under the bonnet...where the gas tank used to be. Pretty dirty and rusty around the area where the wiper fluid reservoir and brake fluid reservoir sit. I took them out to clean them up. The brake fluid reservoir had a loose cap, (the original) that had just fallen off, so a lot of fluid had leaked all over there. Got a new cap for that, and getting some new flexi line for the fluid. You should see this area now, in the 'after' pics. Really looks great.


The upper part of the bonnet/gas tank area. I sanded it down, and touched it up with some matched Ruby Red paint. Looks great now...check back for the after pics.

I'm gonna put 3 batteries in that area where the tank used to be. 


Hopefully a lot work will get done this weekend. Dad is gonna be here for a while, helping out for a week.


Tuesday, September 30, 2008

Lot's of work done...on the car that is..

Haven't had 1 minute to update the blog lately. All extra time is on the car. Plus it didn't help that apple took my computer (in order to fix a faulty logic board) and sent it to HOUSTON, yes HOUSTON, during Hurricane Ike, to the service center in HOUSTON during a hurricane. Brilliant work there, apple. Then they tried to tell me that they wouldn't cover the water damage on my latop...WHEN THERE WAS NONE! This especially riled me because they told me exactly the same thing several months ago when I sent in my old machine. Very creepy because I heard almost exactly the same phrases, verbatim, when they tried to claim that there was liquid damage on this machine, JUST LIKE THEY DID BEFORE. I really don't trust apple anymore, so no more extra apple care coverage for me.

okay, excuse that bit of rage. I have the computer back now, and I've done a lot of work on the car. I swear to freaking jesus on a toadstool that I'll get the pics up soon.

Anyhow, I've scraped, scrubbed, and brushed away all of the rusty bits on the entire floor pan of the car. The entire underside of of the floor pan (lots of time on my back. creating a new tonsure on the back of my skull from rubbing it against the bricks under the car while I did the wire brush rust scrub) is clean of rust. Also pulled up all of the tar mats inside the car, scraped with a chisel is more like it, and cleaned up all of the rust under there as well. Found a few rust holes around the passenger side heater channels, and the area under the heater channel on that side. Just small holes, nothing too major, so patched them up with some small bits of sheet metal and JB weld, or used automotive GOOP on some of the smaller holes.

Hired a guy to come weld a patch of sheet metal into the place where the battery acid had rusted away the floor pan under the back seat. Not knowing much about welding, I assume he did a fine job, but I'm a little worried the sheet metal is slightly too thin. Without the punched pattern in the sheet metal, it just feels flimsier. I stepped on it several times, put my weight on it, and no give, so I think it'll be fine. Plus it's largely under the back seat, so should be fine. So I had to seal up the spaces in the underside after the weld job. Used the automotive GOOP again. I like that stuff. Has a self leveling property that I like.

Then the big job of painting POR 15 over the entire patched and scraped away rusty areas. That's a big 3 step process, spraying their degreaser over everything, then cleaning it off with water. Then spraying their "Metal Ready" over everything  and then spraying that off with H2O after 20-30 minutes. Then letting it dry completely and painting the toxic POR 15 over everything. But it not looks FANTASTIC, for anyone who gets under the car. I did the floor pan, underneath and inside the car, did the foot rest, the entire area under the gas tank area (front of the pan, including the beam assembly and some of the rusty bits, like the steering dampener (not the chrome part, just the fat part of the arm) etc.

That POR 15, some great stuff. Stinks to high hell, but once it's on there, it really improves the look of everything, especially where there was rust. I yam pleezzed.

So I finally got started on prepared for electrical components! I installed the brackets for a shelf that will go in the engine bay area (under the deck lid, remember that term!) and I created the primary brackets for the small battery box that will go in the gas tank area under the trunk (trunk in the bug, being the front bonnet area.) I'm biting an idea I saw in this Ghia that was converted (the guy in the Electric Auto Assoc., I think i mentioned him eariler). He used aluminum slats, beams etc you can get at the hardware store and bent them with his vise. I have a big vise, I don't know the first thing about welding, so I'm doing the same. Good results so far.

I'll be going to TAP plastics to pick up a few sheets of polyethelene (that plastic you can get as cutting boards or cutting mats you use in the kitchen) to create the component shelf in the engine bay, and to surround the battery boxes. Hopefully sometime in the next week.

I forgot to mention that ALL of my electric car parts have now arrived. EV of America came thru in a big way so far. So I'm happy to recommend them, so far. I got everything they said I would get, and it came reasonably fast (especially compared to other quotes i was getting...10-12 weeks away from getting parts.) This includes the adaptor plate/coupler created for attaching the motor to the tranny (haha). 

So the next steps are organizing the component board that will sit just above the motor, and then installing that (before wiring, of course) and then building the battery boxes. 

I also got some 1 1/2 inch PVC to run the fat 2/o welding cable thru to attach the front battery pack to the battery pack. It seems kinda too fat to attach to the bottom of the car, so I'm considering 2 smaller3/4 PVC lines, one for each red and black line. 

I have taken a bunch of photos, just haven't got them off of the camera...coming soon.

Thursday, August 14, 2008

OH, and this is exciting...

After weighing many options, I finally made a decision on who to order my electric car components from. 

Now I've been weighing, and comparing and weighing options for a lot longer than I've probably let on here in this blog. Basically there are about 5 or 6 main vendors for this stuff in N. America, and I've been comparing prices, judging website graphics, coming to conclusions based on the way their color scheme made me feel. I'm not joking.

So I put those feelings away, deciding that these aren't people who are interested in good design, color matching or web aesthetics. I had been writing, calling etc since then. That seemed a bit smarter, perhaps a bit more prudent. It'll create a larger 'sample size.' 

In writing to KTA Services, they sent back a form to fill out about my project. I filled it out immediately and sent it back (emailed.) I waited a week, and never heard anything. So I called (they're here in CA, so I felt okay about calling...why? I dunno...it's that unreasonable reasoning that seems to happen sometimes.) Turns out they had received the form, but hadn't had time to look it over. Okay, that's fine. We're all busy. But it's been about 2 months and I haven't heard a peep from them since. I finally read that they have a new guy that just took this place over, so maybe there's a new ownership problem. Too bad, I liked their site pretty well.

There was the go-to pros, Electro Automotive, started by the guy who wrote the book (literally, Michael Brown wrote Convert It, the blueprint to these projects) on EV conversions. Anyhow, great response (poor graphics on the site, and not a great layout) from the EA team, and very friendly. Unfortunately it looks like they're pumping up the prices a bit, most likely due to their reputation and location (in Silicon Valley). Hey, that's okay. They deserve the extra dough. From somebody. Just not me. I have a strict budget. Not to mention, they were running 10-12 weeks behind on orders.

There were a few others (folks that make Zilla controllers - pricey - or the Warp9 motors, again pricey), there are Sweater and Hat over at electro motorsports, our homeslice. Their site isn't terrible either. Ultimately I decided that they were more comfortable with setting up EV motorcycles than car conversions. That's fine. Just not my thing right now. 

There was e-volks.com, who had a good response time, and seemed friendly. Obviously this is their specialty (VW conversions). Their site was not so pleasing to my eye. That's an understatement. And after reading Convert It, it seemed that 48 vlt systems were not such a good idea. I know that the book is older, but it seems that the basic physic principles still apply. evolks seemed to think (at least according to the site) that the 48 vlt sys was fine. Plus I wasn't sold on their coupler/adaptor plate solution. 

The worst site, by far, was the mismatched, and patriotic Electric Vehicle of America. Unaligned graphics, poor photos, animated flags. So, of course I went with them. They're not even in California. But I did manage to call them once or twice (working against all natural intuition). 

Anyhow, I sold my biodiesel Mercedes and had the dough from the sale to send to EVA for my kit of electric car stuff. Why'd I pick them?

They always got back to me quick, and with smart answers. They are patient with me. They weren't the cheapest, but they were reasonable, and seemed to be offering a good amount of phone support post-purchase to help me with this thing. They also didn't have a long wait time (we'll see if this is true.) I liked the way they went about the adaptor plate/coupler solution (how the motor attaches to the transmission (tranny!) to make the car go. Plus they had detailed instructions on how to wire it all, install it, and a safety video etc. All sounded good, and they recommended I include a couple more contactors/breakers for safety issues. With kids in the car, I like that idea.

So, I fought off my aesthetic intuition towards decision making in this process. I guess that's progress.


Catching up...2 project realization

Missed some posting days. Done a lot. Pics coming soon.

I realized (did i mention this) that this is actually 2 projects. 
A restoration.
A conversion.

I'll have to make a list in 2 columns to help figure out the priorities for these projects (which is really one project, but, y'know, new realization and all...)

So this last weekend, the parents came to visit and Dad helped with some VW work. We cut out the old rubber window seals, popped out the old windows...cleaned them up and then put the new rubber seals on the old windows. I'm doing the chrome trim look (not Cal-look) so we had to shove that chrome trim in the rubber seals too. That seemed like it was gonna be really hard as we tried it after getting all of the rubber seals on the windows. But, apparently, our hands and fingers must've just been fatigued. 2 days later we used a little silicone lube spray, and got those chrome trims right into the rubber, no problem.

I'll wait to insert the side and back windows until I get the headliner done (that'll be on the Restoration side of the ledger), but we attempted the windshield installation. Maybe we shoulda waited a day or two to do this as well, but we didn't have a day or two. Soon after the trim was in, maybe an hour or so later, we tried to put the windshield in the car. The damn trim kept popping out, the rubber was falling away from the glass...ackkk. We tried to cool the rubber off a bit, to get it to hold it's shape a bit more, but it still wouldn't go. As the trim was popping out of one of the corners, I tried tapping back on it with a rubber mallet, and ended up getting a small window crack. So, lesson learned. Don't tap on the windshield with anything when yer trying to shove it in the windshield space. I've read a few more hints about how to do the string trick - found a good page, Rob and Dave's VW page, had some good info - and when I can get another volunteer to help out, I'll give it a shot.

Also cleaned out the old rubber seal under the "deck lid" (remember that term?) and I have the new rubber seal ready to go. I can't believe how many sites I'm looking up to get info on this (besides the books I have - the original 62 manual from VW, a hardback VW book purchased around 62 sometime, the Muir book, and another repair guide (not the bentley, another one). 

What's more, I can't believe how obsessed I'm getting with all of this. I have never been interested in car repair. What the hell is going on?

Monday, July 28, 2008

My Unfortunate Post to The Samba

Okay, ever since I found out I was getting the beetle delivered to me I started reading thesamba.com, which is an all VW knowledge site. Classifieds, forums, very detailed repair work discussed. I even found a few posts about bug EV conversions. After reading it a while, I thought I had a bit of a feel for the site and decided to post.

This is a decision I don't take lightly. 

Part of my job is running the online store for DailyKos.com, and we've been doing that for several years. I've only posted a handful of times in diaries only referring to items available on the store. I've never put up a diary with an opinion as I feel like there are those there who say things a lot more articulately than I can. I'm a bit post shy.

Anyhow, I put up a post, simply asking for advice on what part of the brake and/or suspension system I may want to investigate before installing the electric gear. Again, aren't these people just constantly refreshing their samba browser, looking for a question to release their abundant and powerful knowledge upon us, less enlightened gearheads?

Turns out that they do refresh their browser pretty often, but mostly to strike fear into those who might be considering altering the mechanical operation of what Volkswagen had intended at it's inception (which, I believe, had something to do with Hitler. Didn't it? No, seriously.)

The very mention that I was removing the smelly, dirty, filthy, unholy emissions burping internal combustion engine to replace it with a clean, much smaller, and quieter electric motor seemed to offend at the highest level of VW sanctity.

This is part of one comment:
"Let me get this straight. You join the Samba today to ask questions devoted to totally destroying the nature of this 62 ragtop....give the VW back to you DAD or another relative that might enjoy the VW with its intended style and function."

I guess I was surprised to get that comment.

One guy just kept asking me if I would sell him the car. Seriously, when did I mention I wanted to sell it?

This one was funny:
"...save the bug from a fate so many have faced-molestation..."
I think he may have wanted a colon there where he put the dash, but you probably get the idea.

I then found another thread that discussed swapping out a Mazda motor for the VW aircooled. Not too many comments like these in that thread. Maybe I got lucky. 

I can't help but think that there's more to these comments than just the traditionalist type of thinking. Are there people that are really so married to the idea of burning gas, that an EV swap is that abhorrent? What could possibly be better about that loud little engine, burning gas all over the atmosphere, costing me nearly $5/gallon (it will be by the fall) than installing my SepEx, or whatever the hell it'll be, quiet, clean burning engine? With the back deck lid (I just learned this term, it's basically the trunk of the VW bug, but since the engine is in there, it's a 'deck lid') closed, it'll just be another VW that avoided the junkyard, and is enjoying a second life after a very long 1st life. 

I can't possibly see their point, but then again, I never understood Jesse Helms either.

Next, my thoughts about the SepEx, battery management systems, and more. (Didn't get to work on the bug this last weekend, apart from buying some books on it - finished redoing my bathroom instead and did a lot of...ughhh....plumbing.)

Oh, here's a link to my unfortunate post to thesamba. Note that thee were a few writers who were trying to be helpful, so don't let my outrage paint the wrong picture. Some of them were pretty cool
http://www.thesamba.com/vw/forum/viewtopic.php?p=3177775#3177775

My Trip to the Electric Car store

So I had mentioned the nearby outlet for EV conversion parts, Electric Motorsport. I forgot to mention that I stopped by last week. 

So, as I said, I had called ahead to chat a bit about my project, and the person I spoke to was overwhelming willing to speak about it. Unfortunately all of the info he threw out there at me seemed to leave me a bit confused. He spoke of "just using the dif" and "torque" and "horsepower". Okay, I should brush up on some of this before I go in.

"Dif" or "differential", the part that the transmission is attached to. Why would I want to bypass the transmission/clutch. Well, I guess I'm not sure, but it sounds like a bad idea. I can feel it. I don't know why, but this is something I can instinctually understand, once I understand what he was talking about. I truly have no, absolutely no, scientific or reason based on physics for this opinion. So, there you go...some insight into how I'm making my decisions.

I heard one motor described as "torquey", which I guess is good. Turns out that means it can get going quickly, and has a lot of torque. "Horsepower", as you can imagine, has to do with power, and I figured out I'd need around 16 or 17 horsepower from my motor/controller to get the bug moving very well.

Armed with this little bit of knowledge, I hope to go in and get some ideas for my design. Maybe eliminate some of the more unrealistic aspects to my design. I meet with someone there wearing a sweater. It was kinda warm, so I remember sweater guy. Of course I'm always in shorts, so people probably think of me as the 'shorts guy'. Anyhow, sweater says most of the tech guys are outta town working on a E motorcycle. I get the sense that they work on the cycles a bit more than cars. Anyhow, we talk about motors/controllers, my system, what I my need.  He tends to move in the same direction as the guy I spoke to on the phone. We're talking a lot about this SepEx motor from D and D. Dungeons and Dragons made EV motors? 

So we discuss controllers with the SepEx, how the sepEx has "easy reverse", which I guess can be programmed into the controller. "But wait," I say, having done a little homework,"If I'm using my tranny" (I said tranny, and didn't snicker), "why would I need that? Wouldn't I use the reverse in my tranny." (Again, refrained from the snicker. Oh, I was referring to the transmission.) Then, I swear, I said "It's not like I'm hooking up the motor direct to the dif." Like I'd been using that phrase since high school auto shop. (I took woodshop instead, and LOOK how that has impacted my life.)

"Oh" says sweater guy, "You're using the clutch, well I guess you wouldn't need that, but won't the clutch/tranny make your car heavy?" Then walks in a new guy, I'll call him obnoxious hat guy, but he was a very nice and helpful fellow. He just had a sort of obnoxious hat. Really bright, garish, huge type. A type face I didn't care for. If you like type faces that I don't like, I'll find a way to be prejudiced about it. 

So Obnoxious Hat Guy defends me! "But the tranny makes more efficient use of the energy. I f he shifts in the tranny, the motor isn't needlessly spinning." Or something to that effect. 

Sweater guy then starts talking about how he had a bug, (not electric) and had worked on it, and had used a centrifugal clutch disc and that I should look into that. I think he deliberately brought up the centrifugal clutch disc to get us to shut up about the whole thing. How were we gonna argue with a guy who had installed his own centrifugal clutch disc in his own beetle some years ago?

Then Sweater and Hat get into a discussion about battery monitoring systems, how they don't have one now, but are developing one that will be the best on the market. Wow, I need a battery management system on my car? Sounds a bit complicated. Then a guy that looks like he's missing Alice in Chains rehearsal goes by on a forklift, and Sweater points to him "That's our electrical engineer, he's designing the battery monitoring system." I don't want to jump to conclusions about Forklift Alice in Chains Engineer, as I have a lot of friends who make odd fashion decisions, but happen to be brilliant. For some reason I felt like maybe Sweater shoulda kept that piece of knowledge to himself.

By then, Sweater Guy gets a little distracted, and Obnoxious Hat Guy helps me with a few other questions about batteries, my old 6 vlt system (i can get a dc/dc convertor for 6vlt instead of the 12vlt one he showed me.) We discussed getting a charger that would have to be programmed to deal with my battery pack, and how I'd have to balance my batteries before putting them in. I have to say they were both helpful, but I did leave with probably more questions than answers. But maybe I'd decided to go with the SepEx motor and the controller they were discussing (it did regenerative braking! A concept that when you brake, or slow down really, the controller absorbs the energy of the slow down back into the battery pack and you have that energy saved for later. A great idea, but it sounds like every time you remove your foot from the pedal, you stop coasting and start braking. I imagined driving a lot lot Rocky Balboa when he gets his first car, a black TransAm in the first Rocky movie. Does anyone remember that?

Okay, I leave EM, and go back to research some of the concepts we discussed. Then I make an unfortunate post to a Volkswagen forum

Sunday, July 27, 2008

I joined a club.


"I would never join a club that would have me as a member" - Groucho Marx. I know everyone thinks it was Woody Allen, but he was quoting Groucho, and gave him credit. I always identified with that, and thusly, have never joined a club. With one exception. In High School, we had a club called the TUNA CLUB whose only  criteria was that you didn't have to do anything, or ever see anyone in that club ever again. We had shirts made, and posed for a yearbook picture, but that was the only time we were ever together. 

So I joined the Electric Auto Assoc, their local chapter. I had read that the bi-monthly newsletters had a lot of good, up to date info (they don't put it online, unfortunately) and I could go to meetings and meet some folks who have done this. I went to my first meeting yesterday. 

Suffice to say, I had a couple pages of questions ready for whoever would listen. It took place at a new business called Green Motors in Berkeley. Nice place, they took over an old toyota dealership or something. Anyhow, I wandered in, there were plenty of coffee and donuts. All sorts of crazy electric bikes, cars, minivans (not what you imagine, truly minivans, about as big as a honda civic) were parked around there. We got started with introductions. "What the hell am I gonna say? "

We had to go around the room and introduce each other and explain your projects, vehicles, etc. I'm totally out of my league to speak about anything. I have a 62 bug. I'm trying to make it electric. That's all I got. I'll get laughed out of the room, or shunned, or worse; ridiculed after I leave. There's a guy there with a button that says "Ask me about my electric car" I won't even look at him when I speak. He has glasses, and most of the people in this room have glasses. And beards. I can't look at anyone with glasses and/or beards as they are sure to be smarter, more experienced and scientific than I will ever be.

They started the introductions. The first guy didn't even have a car. Neither did the second. Third guy had that really small electric van. 4th, 5th and 6th guy...no car, though one had an electric bike once, that someone offered him a lot of dough for. Then me. "I have a 62 bug, and I'm  trying to convert it. This is my first meeting, and I'm just trying to collect some info for the design." Done. Okay, good, no one laughed. we move on.

One guy is just there cuz he has a donor car. One guy lost his car in an accident. Sounded pretty upset about it, but no more car. 2 people just bought new electric cars from this delearship. I am astounded at how many people are here that don't actually have a car, bike or motorcycle. They're just getting info too. 

Okay, we watch a demo on this system you can add to your Prius (none of us have one, except for the guys doing the demo) that turns it into a plug in that allows you to drive all electric and changes your mileage to around 100-150mpg. Pretty interesting stuff for those that have an 04 Prius or newer. For the rest of us, seems a bit too pricey. But I applaud their efforts. The whole product interfaces with the Prius computer, so it was a lot of work.

Anyhow, the best part of the meeting was that 1) I was not shunned, and 2) I got to talk to the guy who brought his 68 ghia. He did his conversion in 86! It's still rockin, and is super clean. I got all sorts of good info from him like 1) use a system that uses the clutch (message loud and clear) and 2) use lead acid flooded batteries. I even saw how I could make some battery box hold-downs from hardward store aluminium and my vice, instead of welding. 

Anyhow, lots of good info there, and I'm glad I joined the club. The next meeting next month is a big electric car show, with all sorts of folks bringing their vehicles. I'll see if I can bring the kids and missus. I'm catching a lot of guff from the Missus about joining a club. I guess since I was in bands before, that's sort of like being in a club, isn't it? 

A visit to Electric Motorsports

Okay, as I said, I need some experts. 

I poked around online a bit, trying to find folks to email to get some info. Would they even respond? This would be the easiest, right? Just sit around and see who responds to my totally out of the blue email, asking for all sorts of help.

These people have nothing better to do, right? They just sit around their computer, waiting for the IN BOX to chime as they sit around calculating their EV systems. Right?

One guy wrote back to say I could speak to him if I called him between 8 and 8:15am. I didn't quite get to that. Can't you just email me back to read at my leisure? Call? At that time? This is simply too much work.

Another guy, who I targeted cuz he said he was also a musician, did write back to me. He kept writing back. This is progress. But he couldn't quite get what I was doing. 
ME: "I'm converting a 62 bug for errands/groceries - no range, no speed. Any suggestions?"
HIM: "Try another car. Maybe a VW bus. That would get the kids in it plus groceries"
another email
ME:"The bug is what I have. Don't have a bus. I have a bug. Any suggestions on motors, or vendors or speaking to anyone who designs these things?"
HIM: "Go get an electric scooter. That would be perfect."
another email
ME:" I don't have a scooter, just this bug I want to convert. 72 volts is what I'm thinking. ANy motor you would recommend to use with that?"
HIM: "Oh! You should totally get a scooter. Check out Electric Motorsports on Mandela Parkway, you could ride home on it!"

okay, I gave up on writing back, except to say thanks. But checked out Electric Motorsports. Cool, they have some of this stuff, I'll call them up.

Talked to a guy there, who seemed to understand what I wanted. But then instead of just saying, this engine/controller combo is perfect, we'd talk about one for about 5 minutes, and I'm thinking, 'cool, this sounds good, search over', he'd say, "but you'd get more torque and horsepower with this motor". 

Okay, cross that last one off...try this one. Oh wait, he changed again. Now the amphours have changed. F... What's he saying now? How many batteries? Is he talking about motorcycles now? No he's talking about mini-coopers now. No, I have a bug. A 62 bug. Nevermind, I'll just stop by and talk to you.

"Designing my EV system"

Okay, I've purchased a couple of books on this conversion process. The big one is Convert it! by Michael Brown. I was a bit hesitant, cuz from what I could tell, it was not much more than the sort of thing you'd pick up from the copy store that your college professor told you to get for class. I went to school in the late 80's so college professors probably don't even use paper anymore. But this is what this book reminded me of (a color copies, self cover, kinko's bindery job), but so many people recommended it, I got it. At Amazon, if you can believe it.

Also got this other one that was recommended. I'd go get it now to get the title right, but I hurt my back picking up a sink today, so I don't feel like getting up again. Something about building an electric car. It feels like a real book. Has a lot of charts and graphs that force my eyes to glaze over and think about going to see the new batman movie. But has some good info too.

What's the strangest thing about these books? "Convert it" was released in the 70's i think, and the other one in the early 90's! These people have been doing this since the 70's?!!! WWTF!?? Really? 

But the technology must have changed drastically since then. Right? 

Not so much.

There's a lot more in the way of motor choices, controller choices and places to buy this stuff now than there was then, but the design is pretty much the same. Okay, some confidence building there, and something I can mention to the missus, since she's quite skeptical about this whole plan. 

I don't want to paint a hackneyed portrait of the missus, she's always supportive, but her main concerns seem to be: 1) what the hell am I gonna do with the kids while yer under the car 2) ultimately, is this gonna be safe? Legit questions. I'm planning on setting up playdates and ordering safety belts. But before any electrical stuff goes in, I'll make sure the brakes are serviced, pad replaced, lines replaced etc and I'll work on the suspension a bit, beefing up the shocks etc.

So, at the most basic level, here's my design plan based on my driving habits.
All the driving will be within a 4 mile radius, back and forth, dropping off kids, picking them up, getting groceries, hardware store, post office, that sort of thing. In our little town we have a speed limit of 25mph, which is pretty strictly enforced, so neither my speed or range is very challenging. It's also completely flat, as we're right next to the bay. Pretty ideal driving conditions. Plus our office is 2 blocks from the house, no big commute for us.

I don't need much. We have a Suburu that we can take outside of town for anything requiring range/speed/highways etc, but 80% of our driving is this stop/go in town crap. 

Based on that, I decided I needed room for the kids (so the rest of the passenger area won't be filled with batteries, unlike some vehicles,) I didn't need much range (settling for 12vlt batteries, 6 of them for 72 volts. You see, if you have 12 6 vlt batteries, you'll get a lot more range, but you lose that space in the car etc...then have added problems cuz of the weight you added, and what that does to the car etc - I read about some guy who put about 8 or 9 batteris under the VW hood and seemed surprised when he busted the point where his axle sort of attached to the chassis. A bit heavy, maybe?)

Okay, so only 4 batteries behind the back seat, in a well carpentried heavy duty battery box (remember, I can cut and join wood purty good!), 2 batteries under the hood in a 72 volt system. That should get me up to 45-50, conservatively if I need it, and about 20 miles range. It should have the same power (accordingly to Michael Brown's Convert it!) as the original 1200 engine that was in this bug when it began life in Germany. 

[Sidenote, for the gearhead: The engine I dropped turned out to be a 1600 cc long block rebuild my dad had done (or had done) back in 94. The original engine had been rebuilt in 81, and then he decided he wanted more power, so in 94 got the long block. maybe that's why it was harded to get out with the exhaust?]

Okay, putting a motor in the back, with some sort of adaptor plate and motor coupler to attach to my clean tranny. There are a lot of choices on this but I've decided (more on this in the next entries) that 1) I need a system that uses the clutch and 2) these adaptor plates/couplers are on a long delay from whoever you buy them from. One company, actually M. (Convert It) Brown's out fit, Electro Automotive, quoted about 10 weeks to get that part done. I don't have that kind of time. 

Needless to say, I haven't decided on the motor or controller yet, just the voltage, the fact that I'll use lead acid flooded batteries (more on this choice reasoning later) and maybe that's it.

I'd better talk to some experts...I joined a club (something I've NEVER done before in my life.)

Dropped the engine, uh, now what?

Yup, I knew all about getting that engine outta there, but now what? What don't I need anymore? Gas tank? Yes! Starter? Yes! Okay, let's do that.
15 minutes later: Well, that was comparatively easy. I'm used to the engine drop. What the hell?

Okay, there's a bunch of crap stuck underneath the transmission. I reckon that could be 40 years of crud under there, okay, let's chisel it off.

I read somewhere on a VW forum that spraying oven cleaner (yes! oven cleaner) on parts of yer greased up car would work pretty well in getting the grease off. The post even mentioned "oven cleaner from the .99 cents store" working perfectly. I've got a .99 cents store, right around the corner! Okay, this I can do.

Got some oven gloves, got some metallic sponges, got some .99 cent oven cleaner. Sprayed it all over the underside of the tranny. (snicker)

Waited a while.

Waited.

Waited.

Wiped. 

Did I spray enough on there?

Spray.

Spray.

Wait.

wait.

WIPE!

Well, that's disappointing. It made the curd kind of 'moist', but not really the grease cutting action I was looking for. 

I had some Simple Green formula for auto cleaning (purchased for another application...probably to clean my BBQ last year,) so I broke that out. Now we're getting somewhere. So i had a small square dowel I used to scrape this crud away. I spent most of my day doing this. I think it'll pay off in the end, as I'll have to keep getting my hands on this tranny (double snicker), and spend time under the car. I don't want this crud continually falling in my eyes. The crud in the picture, is some of what I chiseled off.

A feeling of tepid self-satisfaction sets in at the end of the day. But that's mostly cuz I fixed our ancient wall hung, high pull chain toilet on this same day. I should dedicate a blog to that.

dropping the VW engine


I'm naming this, dropping the VW engine, cuz that was the search phrase I used to find some info about pulling this engine out. I learned, that most people refer to it as "dropping the engine" on a VW, cuz that's actually what happens. You lift the bug, you undo a few nuts and bolts, pull a little and the engine drops outta the back. You wanna be a little careful not to bend the drive shaft that comes out of the transmission, cuz you need that later. And it would be quite difficult to replace that later. 

Oh wait, I should say this: I'm not much of a mechanic. I have a good deal of carpentry experience, as I rebuilt my kitchen (after tearing it all out) from scratch once. So I can do stuff. But most of what I do is write songs, record, run a business that (when I'm going good) uses some of that creative energy. So a gearhead, I am not. My mechanical skills (using that term sarcastically) come from keeping an 82 dodge 15 passenger van on the road while I was on tour with a band. And I really felt like that was a crappy experience. But I'm turning on a new attitude about cars. I never did much 'maintenance' on that old van. never took in interest in things like 'changing the oil', 'inflating the tires', crap like that. But no more! Before I get the electrical stuff in there, this bug is gonna be "cherry"! I dunno what that means, but heard someone use it in a context that seemed to indicate that this was not only good, but also meant tht the car was in a very clean condition.

Back to the grease: So I dropped the engine. I didn't plan it as well as I wanted to. Without getting into too many details, suffice to say that with the car up on jack stands and jacked up a little further with the floor jack, I quickly (or slowly) realized that in order to finish this process without braking that drive shaft I mentioned earlier, I was gonna need another floor jack. Crap, another floor jack. That's about $40 i don't wanna spend. Or break the drive shaft? $40 more? Break the drive shaft? Okay, okay, I'll drive up the street and get another one.

Whew, that did it. The floor jack went up and held the car a bit higher (pushing up under the tranny bell), while the engine was sitting on the first floor jack (are you getting what mistake I made now?) I pulled on it a bit to get it off of the bolts and drive shaft. 

[Insert brief scene where I ran next door to get my neightbor to help me pull the engine away from the tranny and help me drop it. We did that, only to realize that it wasn't gonna move without taking off  the exhaust system. Okay, many of you will say, DUH, I figured you already did that. Well, I'm a songwriter, following instructions I got off of google searches...what did you expect? So I pulled off the exhaust while my neighbor went home for a while. Now back to the scene, taking place after I had removed the exhaust system.]

Okay, by myself now (neighbor had to leave to deal with screaming children), and wrestled the engine away from the bolts and drive shaft enough to get all of the weight on the floor jack and start slowly 'dropping it down.' Success! Yes! I felt like a wrestler after beating Hulk Hogan or something, cuz those aren't such real fights, and I knew I was gonna win eventually. All those directions from the google searches couldn't be wrong, could they?

Anyhow, here's a pic of the tranny without the engine. I did feel a great sense of accomplishment.