
took the day off (it was a holiday, officially) and managed to get the motor mounted today. A friend of mine help me scribe the plate on the bell housing (he used a dental pick!) I never would have thought of that. I t
 ried a sharpie, and it just wasn't working out. He scribed it and cut it (I didn't think my collection of saws would do the trick.) I got it back last night, and then drilled the four mounting holes. My pal loaned me these center punch pins, not sure of the real name. They fit into the mounting holes in the bell housing, then I clamped the plate onto the bell housing, and then tapp
 ed the pins from the back, which punched a small hole into the aluminum adaptor plate to give me a center point to drill into.
Hooray for the center point!
Anyhow, I then used my drill press to make the holes. Drill press was great, cuz I didn't have to do pilot holes; just clamp and drill. As I probably mentioned, I'm a wood guy, not a metal guy, so I'm not too familiar with using metal as a material to drill and assemble. Aluminum is a very strange material. On one hand it's like a soft wood. When you drill it, it's a fairly easy, satisfying feeling to pull the drill bit down into it. But then it gets soft, gooey, and a bit like soft plastic or something. But then, the final result always looks sharp.
Okay, so here are some photos of the adaptor plate, the motor, with spacers on top of it, and then the motor mounted into the car.
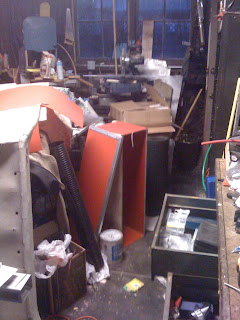
Now have a look at my garage (shop). It's such a crazy mess. Someone, come over and clean this up. You can sort of see the battery box and component board in the background in one of these.


My strategy now is to finish all electrical stuff before getting back into the restoration stuff. The only caveat in this approach is that before I finish the battery box (the one behind the back seat) installation, I'll have to put in the insulation and carpet before it's done. Sort of backwards, as far as the interior goes, but that part of the carpet, I think, I can put in before dealing with the headliner.
Below is the volt meter. I just picked up a couple of gauge brackets locally to install these under the dash. That's the next step.


No comments:
Post a Comment