So it's been a while since I've posted. But it's largely cuz I've been driving.
I've put about 100 miles on the ol' bug so far, and it's going well. A bit of trouble shooting, but for the most part, good news on the EBug.
I was putting off this post until I inputted some video of my first test drive. But now I can' find the tape. The first test drive was rather funny. I backed out of the driveway pretty well, and took off down the street...all at about 5 miles an hour!
I had the original accelerator pedal linked up to the PB-6 Curtis pot box, that determines the amount of voltage that hits the motor. At first, the old cable was looped directly onto the arm of the PB6. Resulting in a top speed of 5 mph. A few adjustments, and I was able to get it up to 25mph a bit later. The 'throw', or area from the top of the accel pedal to the bottom of the pedal wasn't the same distance as the pot box arm. So I tried using a turnbuckle to attach the accel cable to the arm. It was far easier to adjust, and worked pretty well, but I still couldn't get the PB6 arm all the way down to full acceleration. I could adjust it too far, and then as soon as I turned on the ignition key, the car would start moving. Not a good choice.
Anyhow I lived with this for a month or so, as I had a bigger problem.
My 12 volt battery wouldn't stay charged. I tripled, and quadruple checked my wiring, and everything was good. I checked with EV America, and one guy there said I had my DC-DC converter set up correctly. Of course, he's the same guy who sent me the email instructions as to how to hook up the DC-DC converter (as this information wasn't included in my original schematic...why? good question.) So I finally end up talking to the other guy at EV America, the one who actually knows electronics, and it turns out there was a missing relay in my system. Not only a missing relay, but also a missing schematic that even mentioned that I NEEDED a 2nd relay. So they sent me the relay, but only after not 1, but 2 different trips home in the AAA truck with the bug. Not to mention a great deal of humility and embarrassment from my neighbors and family.
So I got the relay hooked up ( the DCDC converter had been sucking the 12 volt battery because the relay wasn't there to switch off the juice), and it's been fine, though I haven't done a measurement on the DCDC converter, measuring input and output. Need to do that.
Next problem was the pedal issue, so I ordered a gold cart pedal from some golf cart parts online store. I saw the pricing for the curtis pedal was around $250-$300. Pricey. Found it on this site for $12.50. Not a typo. Twelve bucks and fifty cents. Must have been in their system wrong, but they sent it to me. It wasn't a Curtis, another brand, but it does the same thing.
Only problem is the size. It's really big. No room to put it where the old pedal was. Think outside of the bug box. So I put it where the clutch pedal was. Yes, was. I used a dremel and cut the clutch pedal off (heresey!) So I fastened the behemoth pedal to the floor with a 2" wide piece of stainless steel, bent at an angle and bolted to the floor. Even on this side, the pedal is too big for my taste. However, I get full juice! I got it up to 50 mpg going thru the tunnel. Much better reaction, but I'll have to put the insides of this pedal into a smaller housing. Someone had the idea to use an old wah wah pedal housing. If you have one, send it to me. I think it'll work. Not a Morely variety, but a CryBaby wah type would work.
It's time to service the batteries now, add some water, etc. Not looking forward to that, just kind of a pain, but part of the deal.
I redid all of the door rubber on the passenger side. Looks great, but damn, my fingers really got cut up on that job. Slipping them inside the door with the window etc, I almost lost my poop.
I have to do the same job on the driver side, and have been putting it off quite a bit. Then I have to replace the ragtop. Another job I've been putting off. I'll get it done soon.
Next post: pictures and maybe some video.
Promise. Totally.
Saturday, March 21, 2009

Sunday, January 18, 2009
Wolfsburg West Rocks!

Just a quick note about the level of service I'd had from the 3 sources I used in obtaining VW parts for the restoration aspect of this project.
WOLFSBURG WEST is BY FAR the best to deal with. I can order and know, that no matter what, my order will arrive within 3 days. Like clockwork. I've called and spoke to them, very helpful, friendly. The parts are clearly labeled when you get them. They didn't screw up a single order. Everything was packed immaculately. The quality of everything I received was the best of anything I received. Especially the window rubber seals. I see almost no reason to use anyone else.
In experimenting I also used Jbugs. If WW gets an A, Jbugs gets a C+. I always got my order, but if it was back ordered they never notified me to let me know. Some orders were backordered into 3 or 4 shipments, but I never received any notification that this was the case. So I had to call them a lot. Their site could use a lot more description and photos. For instance, all their carpet kits have the word "super" or "deluxe" in them, so it's nearly impossible to understand what the difference is in the quality of the carpet you order. The one I got is fine, but a lot thinner than I had imagined it would be. They didn't send directions with anything, and when you have a carpet kit and headliner kit for a ragtop (with many pieces) a simple key would have been quite welcome. And helpful. When speaking to them on the phone for some help, they weren't really interested in speaking with me, and I always got the feeling that they were trying to get me off of the phone.
If Jbugs was a C+, BFYobsoleteparts.com was certainly an F. Really quite horrible to deal with. I only made 2 orders with them, and both of them were disastrous. The first sent one item, and a sheet saying the other orders were backordered, with no date given. After 5 weeks I finally called. "Oh that got shipped this week. It's not there yet"? A week passed. I called again. "Oh, yeah, we've been out of that. Coming in soon" It's was nearly 3 months later I got the rest of the order.
I guess I forgot how long I waited for the first order when I placed the second one. This was more maddening as I needed this stuff quickly. So after a month I called. "Oh, that went out this week, you should have it tomorrow" I made a special trip to my office to be sure I was around to accept the package. Nope. No show. I called the next week. "Oh, we were waiting for another item to ship it"
"So you never shipped it like you said you did"
"I don't know about that, but we were waiting for another item"
"Well, I've waited a month, can you send it without the other items"
They agree to do so. If the other part isn't in the next day, they'll ship it out.
Another week goes by, after I make more special trips to wait for the shipment. I called again.
"Oh, that's going out this week"
"But you said it was going out last week"
"But we were waiting for another part"
Keep in mind now, that everytime I called, I talked to the same guy.
"But you said that if the part didn't come in, you'd ship the package last week."
"Oh, well I'll ship it today for sure."
He didn't. I called the next week.
"Can I have a tracking number? You never shipped the package"
I get a different guy with a british accent.
"Oh, it's still here. You can have it shipped today"
"But I'll be out of town for the holidays, if you ship it today I'll be gone when it arrives. Please send it on the 24th so it arrives by the 26th when I'm back"
"Okay, will do."
"Well, the other guy told me 3 times that he had shipped it, are you sure you'll ship it this time?"
"I don't know what he told you, but I'll be sure you have it by then"
Guess what happened?
On the 29th I called again.
"Why isn't my package here? I expected it a couple of days ago."
writing this story...recalling it for you, is as painful as it was to call them.
"UPS didn't come by to pick it up"
"That's bullshit. I know UPS was working on that day. Why isn't it here?"
oh, i was talking to the original guy, not the british one.
"Well (the british guy) said he didn't want to send it to you while you were out of town."
"That's why I told him to send it on the 24th so I would receive it when I was back here."
"Well I dunno what he said, but UPS didn't pick up that day"
"Well, which is it? Not to mention that you've already told me it had shipped, and lied about this package, I don't really believe anything your saying anyhow."
"I'll ship it today, it's all wrapped and ready to go"
what else was I gonna say? I could cancel the order, but I figure that they'll screw that up too.
"I have to say that I'm incredibly disappointed in your customer service. This is about the worst service I've ever had from an online order."
long pause
He wanted to tell me to get f*#$ed, but he didn't
"I'm sorry to hear that sir"
The package finally showed. But the items that they were waiting on to ship it originally, still have not showed. It's been 2 months. Don't use BFYobsoleteparts, as the only thing obsolete about them is their incredibly horrible customer service. I can't emphasize this enough. Stay the hell away from them.
Go to WOLFSBURG WEST.
Full disclosure: I have no interest or relative or friend or family that is involved in WW, (or the other businesses I mentioned, for that matter.)
Miscellany
The work has (as usual) got way ahead of the blogging. Trying to catch up.
Some miscellaneous items I caught up on.
In changing the bulbs from 6 vlt bulbs to 12 vlt bulbs, I had discovered that the taillight (pass side) was in extremely bad shape. Not only rusted out at the bottom from the worn out rubber seal, but several wads of tin foil had been wadded up inside with some gum or bondo. Check it out.
Before:


AFTER:

The signal lights on the front fenders have 2 bolts that attach them to the bumpers - so rusted they just broke off when I tried to remove the nut. So they had to get drilled out and replaced with new bolts. More uncovering that keep the process going longer than I want.
Also added the new running boards...

Basically the entire battery pack had been hooked up by this point with no melt downs. That was a big deal. Then I had to hook up the old wire harness (original bug electronics, former 6 volt system, now 12 volt system) to everything, and see if we were getting any juice.
The 12 volt system controls the 72 volt power system. When you turn the key, the 1st contactor closes to start the flow of 72 volts. When you step on the accelerator it closes the 2nd contactor and you have 72 volts thru the controller/motor etc. So I turned the key...click, first contactor...pushed the accelerator (car was up on jack stands) and click we get 2nd contactor and some wheels turning.
All sorts of excitement!
Might as well try the headlights...nothing. How about the horn (I had to replace that as well to 12 vlt), nope nothing. Parking lights come on, but when the headlight switch is pulled all the way, I hear the contactor engage. Alright, tons of weirdness.
I spent the next 2 weeks tracking down ground demons. Ended up pulling out headlights, checking for ground shorts, examining all of the wire loom, the old wiring, every connection. This sucked. A real head pounding against the wall experience. Finally my pinball electrician pal stopped by and helped my suss out the issue (be sure and check out his spot, http://www.ujuju.com - all pinball palace.) Turns out I had a bad ground to chassis connection. The area where the negative battery connector was attached to the chassis was too dirty and painted. A little filling and everything was working properly. Hooray!
Some miscellaneous items I caught up on.
In changing the bulbs from 6 vlt bulbs to 12 vlt bulbs, I had discovered that the taillight (pass side) was in extremely bad shape. Not only rusted out at the bottom from the worn out rubber seal, but several wads of tin foil had been wadded up inside with some gum or bondo. Check it out.
Before:


AFTER:

The signal lights on the front fenders have 2 bolts that attach them to the bumpers - so rusted they just broke off when I tried to remove the nut. So they had to get drilled out and replaced with new bolts. More uncovering that keep the process going longer than I want.
Also added the new running boards...

Basically the entire battery pack had been hooked up by this point with no melt downs. That was a big deal. Then I had to hook up the old wire harness (original bug electronics, former 6 volt system, now 12 volt system) to everything, and see if we were getting any juice.
The 12 volt system controls the 72 volt power system. When you turn the key, the 1st contactor closes to start the flow of 72 volts. When you step on the accelerator it closes the 2nd contactor and you have 72 volts thru the controller/motor etc. So I turned the key...click, first contactor...pushed the accelerator (car was up on jack stands) and click we get 2nd contactor and some wheels turning.
All sorts of excitement!
Might as well try the headlights...nothing. How about the horn (I had to replace that as well to 12 vlt), nope nothing. Parking lights come on, but when the headlight switch is pulled all the way, I hear the contactor engage. Alright, tons of weirdness.
I spent the next 2 weeks tracking down ground demons. Ended up pulling out headlights, checking for ground shorts, examining all of the wire loom, the old wiring, every connection. This sucked. A real head pounding against the wall experience. Finally my pinball electrician pal stopped by and helped my suss out the issue (be sure and check out his spot, http://www.ujuju.com - all pinball palace.) Turns out I had a bad ground to chassis connection. The area where the negative battery connector was attached to the chassis was too dirty and painted. A little filling and everything was working properly. Hooray!
Saturday, December 20, 2008
Batteries Are Heavy
I'm not sure if the batteries won or if I did, but the batteries are in the car and my back is in pain. It's better, but was a bit sore for a day or so.


Anyhow you can see here I got the batteries in their respective positions, and the best news is that the ones in the back battery box I built actually FIT! You can do all the measuring you want, and still feel reasonably confident that you did the measuring correctly. But until it's time to put the pieces together, it seems like anything could go wrong.
I am replacing all of the light bulbs since I am also switching over to 12volts, as it was originally a 6 volt system. So I replaced the headlights, and while I was at it I swapped out the old headlight rings for new ones and installed the "eyebrows" just cuz. Makes the car look stoned. Or sleepy. Looked as if the parking lights in the headlight housing had not been used in years, as the connecting wires to them had been cut and wrapped up. So put in new parking lights and hooked them up. Also had to get new headlight springs, as the old ones had rusted so much, they didn't have much spring left in them. These are more like clips that work with a spring like action to hold the sealed bulbs in place, and also the assembly to the headlight ring. Also added new rubber seals from body to headlight.
Then went through the process of replacing the rubber seals and bulbs for the front turn signal indicator lights. These little deals are more involved than you would think. Not just a seal, but under the signal the seal holds the wire that connects the light inside a rubber tube that seals to the chassis. So I had to remove the light assembly (no easy feet, lots of rust and had to break two nuts off of the screws, drill out the screws and install new ones) then rethread the old wire (after cutting off the spade connector), and install a new new spade connector on it in order to attach it back to the assembly. Just more time consuming than I expected. The seals on the back turn signal lights look a lot easier since there is no rubber hose portion to it. I pulled off the passenger side back signal housing today only to find that the bold holding it in is rusted and stripped from the top. Looks like more extra work, but I'll save that for after xmas.
Below are all of the cables I finished making today that will connect the batteries. I have the front battery connectors installed, just need to get the back seat box batteries connected, and then connect the packs to the system. After double checking my wiring of course.
Happy holidays.
Sunday, November 30, 2008
Rugalicious
Lots done over the long Tgiving weekend. My hands hurt.


Check out the rug...
Ran some wiring from the charger (which I placed under the back seat) to run up to the front of the bug. I have the charger plug set into the passenger side horn grill (since there's no horn on that side, just the grill.) I still have to shoot a picture of that one. It's a part I got from an RV parts online store.
Anyhow, after laying down the wiring, I went to work on the rug. Used up a whole can of contact cement, and I've been dizzy ever since. Brushing contact cement is one of those jobs you can't really get done fast enough. The reward is nice, and feels like yer making progress, but those moments you have where you are staring at the cement brushing onto the back of the carpet, watching it dry (don't put it down until it's 'tacky'!) seem to be the longest moments. Those moments that allow you to reflect "What the hell was I thinking...?"
Anyhow, looks good now. Check out the back seat.
You can see the box behind it. The battery box that is. Yes, got it fitted in on TGiving, in between making a pumpkin pie, vegan stuffing (brown rice, celery, mushroom, cashews, macadamias, vegan sausage, dill seed, and fresh dill mixed in at the end, yum), potatoes with garlic and painting the rims. You see what I mean about how little time I have?
Here's the rims...speaking of painting them...
They need a few coats of clear coat. Doing that this week and taking them to git tires put on. Then I'll try painting on the white wall. Got a special paint for that.
Had a friend who runs the Lucky JuJu pinball palace (check out http://www.ujuju.com) who is an electrical engineer type stop by to inspect some wiring and schematics. Had to figure out had which lines off of the old wire harness to use to incorporate into the new system. Figured it out, and got some tips on wire gauge and how to run the wires thru the comp board. Good stuff.
Expecting batteries this week...I still have to secure the front battery area. Back box is obviously ready to go.
My daughter told me today that I'll have the car finished before she is 6. That happens on Dec. 31. I hope so.
Oh, here's the old throttle spring I incorporated into the potbox....
Tuesday, November 25, 2008
Some interior, some wheels, some injuries...
Okay, since the motor was installed, and the component board installed, I've done some wiring to almost complete that part of the job. I had to install the potbox (the box that is the go-between from the throttle pedal to the controller), and once that was in I could put the connections from that onto everything else on the board.
If it seems that I'm repeating myself, it's because I rarely read what I've written previously. Plus, I'm super tired.
So I had my rims sandblasted, but here's how they looked before that.
Pretty bad. So then I had them sandblasted, and then I treated them with the POR 15 pre painting chemicals (1st chemical, wash off with water, 2nd chemical, wash off with water).

Then I primered them with the grey POR 15 paint.

I hope to do the final painting this weekend. I have the stock colors in some rattle cans, plus some clear coat. Doing the two tone deal, with the anthracite (grey) on the outside of the rim, and ruby red on the inside.
So here's a story for the truly bored: My next step was to get the battery box installed, which was going into the luggage area (behind the back seat.). I've already measure and drilled holes for the install, including the stainless steel 1/8 inch hold straps I made to hold the top of the box down. But back in that area there will be carpet. So my first thought was that I'd just lay down the carpet in the middle of the luggage area, and do the rest of the carpet later.
Nope.
There's a very specific order in which to do the interior, and before I lay down and glue the luggage area carpet, I have to install the carpet that goes over the wheel well area. Okay, not too big of a deal.
Oh wait.
Before I install the wheel well carpet, I have to have the headliner (the perforated vinyl wrap that goes over the walls/ceiling/interior of the car) installed, because the bottom of the headliner is glued to the wheel well area, and the wheel well rug is glued over the headliner.
Hell.
Looks like I'm doing the headliner. At least part of it. Here's how the luggage area looked before any headliner or carpet. All I've laid down is the silver shiny deamplifier material to deaden the sound and help insulate the car.

So to start the headliner, I have to start on the B pillars (the vertical pillars in the middle of the car, where the doors lock to the car.)
I realize that the deamplifier silver stuff looks a lot like dryer duct tape, or plain ol duct tape. It has a tar like substance underneath it, and it's a nice pliable material, that is very easy to work with. I'm really looking forward to experiencing the affect it will have on the noise level. Not that I'll have a loud motor (like the VWs normally have), but it should make for a quiet cabin. I don't have plans for a stereo yet, but do plan on doing something eventually.

The other 'ghetto' looking item you may notice in the photo is the under carpet material there in the panel area. Behind that there is some deamplifier stuck to the body, but there was still space, so I had picked up some of this carpet padding, just a scrap of it for free at a carpet store, for this very purpose. I wanted to insulate this area. Anyhow, on to the next photo of more headliner.

The headliner on the ceiling is the old stuff...haven't done that part yet. Just look at the wall above door stuff.
Proud of my folds on the area above the drive side window. Wow, I can't believe I wrote that sentence. This project is truly putting me into a weird bubble.

And the back. You can't see the part I goofed up back there, and I'm not telling where it is. Wheel well rug is in too, you can sort of see it, as well as the two 2/0 wire coming in for the battery pack. As I thought about the project after working most of the day on Sunday, I think I have to find new areas for that wire to enter the cabin. In fact, yeah, those holes won't work. What the hell was I thinking.
Trying to do this, while also trying to fit in work time, and hanging out with the family time is really challenging. Both kids want to help so much, but it's not like I can give them the wire strippers and tell them to go for it. Basically I have to completely work out the small tasks I need to do, way in advance of heading out to do it. And I have to know exactly what I'll be doing and how. If I have to improvise something, or make a decision on the design, while also knowing I have to go inside soon to make a sandwich for someone, or get someone down for a nap, I'm probably gonna make a mistake. That's what happened here.
On Sunday I let me 3 yr old 'help' by holding my iphone. He mostly watched Super Friends on YouTube, but then he discovered the camera, and how to take pictures. He took some great ones, actually, and here's one he got of me...

At the end of the day on Sunday, I finally fit my battery box into the luggage area. Guess what? Now it doesn't fit. F#*@&*@! Is similar to what I said when I realized this. Mostly because that was the goal I had for the day: to fit the battery box into that back area. Well now I'll have to cut away some of the rug that won't be visible when the box is installed, and it should fit fine. I'm very happy that I have not glued any of the big rug piece, just the wheel well rug, and I probably won't have to remove a lot of that.
A new feature: INURY UPDATE:
My fingertips are really sore, and I had to cancel out on a music rehearsal. Couldn't play guitar at all, and I was supposed to play standup bass for this thing. Not. A. Chance.
New cuts. Almost every cuticle has a deep cut that is irritated when I put my hands in my pockets. But the one I got from my japanese saw (from fitting the supports on the bottom of the battery box), has healed up nicely. I was sure it would scar, as the skin didn't want to join back together. Neosporin really helped out on that one.
My chiropractor thinks I'm nuts, cuz every time I come in I have a new car related issue. This time it will be lower back, on both sides, from reaching around into the back cabin area, thur the rear window, and the other hand reaching up under the back window area in order to try to blindly secure a nut onto a bolt pushing in from the interior. This took WAY too much time on Sunday, and my back hates me for it.
Unrelated to the car, but foot has decided to start hating on me. The bridge of my right foot doesn't like it when I walk. Standing: ok. Walking: bad. Very bad. I'm icing it every night, and nothing is helping. Might have to see the chiropractor early to see if she can help with this one. So because I'm limping, now my hip joint is barking.
Did I mention the rotator cuff/bursitus in my right shoulder. I can't really lift anything heavy, or throw anything or I collapse in a pile of throbbing, aching muscle goo.
Can't wait to start back on the car after thanksgiving.
Tuesday, November 11, 2008
Motor is IN!

took the day off (it was a holiday, officially) and managed to get the motor mounted today. A friend of mine help me scribe the plate on the bell housing (he used a dental pick!) I never would have thought of that. I t
 ried a sharpie, and it just wasn't working out. He scribed it and cut it (I didn't think my collection of saws would do the trick.) I got it back last night, and then drilled the four mounting holes. My pal loaned me these center punch pins, not sure of the real name. They fit into the mounting holes in the bell housing, then I clamped the plate onto the bell housing, and then tapp
 ed the pins from the back, which punched a small hole into the aluminum adaptor plate to give me a center point to drill into.
Hooray for the center point!
Anyhow, I then used my drill press to make the holes. Drill press was great, cuz I didn't have to do pilot holes; just clamp and drill. As I probably mentioned, I'm a wood guy, not a metal guy, so I'm not too familiar with using metal as a material to drill and assemble. Aluminum is a very strange material. On one hand it's like a soft wood. When you drill it, it's a fairly easy, satisfying feeling to pull the drill bit down into it. But then it gets soft, gooey, and a bit like soft plastic or something. But then, the final result always looks sharp.
Okay, so here are some photos of the adaptor plate, the motor, with spacers on top of it, and then the motor mounted into the car.
Now have a look at my garage (shop). It's such a crazy mess. Someone, come over and clean this up. You can sort of see the battery box and component board in the background in one of these.


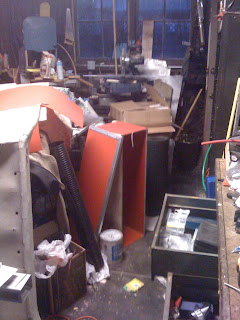
My strategy now is to finish all electrical stuff before getting back into the restoration stuff. The only caveat in this approach is that before I finish the battery box (the one behind the back seat) installation, I'll have to put in the insulation and carpet before it's done. Sort of backwards, as far as the interior goes, but that part of the carpet, I think, I can put in before dealing with the headliner.
Below is the volt meter. I just picked up a couple of gauge brackets locally to install these under the dash. That's the next step.

Sunday, November 9, 2008
More Progress...old pics and new...

Okay, there's been good amount of progress. First pics showing the POR15 paint job I did on the interior, painting over the welded patch of floor pan, and various parts of the floor pan. The POR (paint over rust)15 is this noxious paint, that turns into a hard shell after painting (and using the prep products as well). But it keeps the rust away and gives a nice glossy finish. I got this in some strange places (face, inner thigh, back of knee...i have no idea.) I painted the e-brake boot as well. It's the original and was pretty stained up, so I tried using the POR on it. Turned out pretty well.


And here we have the same areas after we laid down some sound dampening material. Got it at SecondSkinAudio from Arizona. When I say we, I mean me, my dad and my kids. They enjoyed using the rollers on the material to help stick it to the floors/walls. When it's time to put the carpet in, I'll put a layer of heat insulation on top of this stuff which should allow for some cushioning as well.
 At this point i'm feeling WAY too lazy to match up my text with the pictures. I've been writing html for over 10 years, and the blogger interface makes it pretty hard to get this to work correctly.
Anyhow, you'll also see my first succesfully created 2/0 connector wire. That's the big thick wire with fat connectors on the end. There's a photo of the 2/0 wire cutters, along with the crimping tool and a small cut of the 2 ought gauge wire. That crimping tool needs more than a standard hammer. I could crimp succesfully by slugging it with a 3 lb sledge hammer, about 5-6 times. When that was waking my son during naptime, I switched to the more passive vise. I liked the vise better. I just put that entire crimping tool in the vise with the wire and connector and crimped it right down. Then put the heatshrink tubing over the connection, and shrunk it down. It's quite the heavy duty heat shrink, and becomes about 1/8" thick once shrunk down.


 You'll also see the test battery boxes made from cardboard to get the best idea for a box fit. We went thru a few different ideas with cardboard until I settled on the red one you see. It's made of plywood, but then I glued thin sheets of polyethylene plastic around it to protect the box from potential water spillage/battery acid.
You'll see the front area here, where the gas tank used to be, and then my test cardboard boxes to see if the batteries would fit. It looks like the middle battery would be too high, but we put the bonnet back on (hood, but on a VW it's a trunk), and check the height. Plenty of room.


There's the area under the deck lid in back, where you can see the transmission, and then the 4 brackets I made for my component board. Then there's a photo of the board setting on those brackets. And then another one of the board, mostly wired up, sitting in there again. Today I got the final 2/0 wiring done on the board, but there's no pic of that yet. I also installed the pot box just above the component board. Then I ran 6 lines of 14 gauge wire from the component board area, thru the passenger area up to the hood area, mostly for the meters, but 2 extra, in case i need them.
The discerning reader will notice that the components have been moved around a bit since I wired them.
You may notice the 2/0 wire that's housed inside the clear pvc tubing, it runs under the car. Pops up into the hood area, and back into the deck lid area. Before I put the sound dampening material on the floor, we had run some small nuts/bolts thru the floor to attach some supports that hold the 2/0 under the car at about every 15" or so.
Also, how's that re-upholstered front seat look? There's two of them done, and I still have to do the back bench seat.
I got the carpet, carpet glue and headliner. Not sure when I'll start that. I think I'll go for finishing all the electric insides first, and then get into finishing the interior. I still have to bleed the brakes with new fluid and add tranny fluid (yes, 'tranny fluid').
I also have to re-do the doors. I have all the door rubber, etc, but again, I'll save it until I get it running with the electric gear.
Last picture there is the sad state of rims/tires. I'll be taking them to get the tires pulled off this week (tires are bad), and get the rims sandblasted. Then I'll pain the rims, get some new tires put on and I plan on painting on the white walls. I'll try that, with the Ranger paint I got, which was designed for tires. We'll see how it works. Being that it's an electric car, I couldn't use the non-radial tires, and white walls only come in the bias tires.
Hopefully next week we get the adaptor plate on and attach the motor...
Friday, October 10, 2008
Some pictures, yo~!
Here's some pics...all before I did any rust work...the after pics coming in a day or two
Here's the big hole in the passenger side floor pan. This is the area between the underside of the back seat, and the passenger seat. Same old story: battery acid leaked out from the area under the back seat, and got under the tar board...sat and sat and sat and sat...no one could really see the rust under the tar board. I ended up cutting out a larger area to rid the old rusted out part of the pan, to get to solid material to weld to.
.
 Here's the passenger side rear shocks I put in. Coil overs (it still had the original shocks!) to support the extra 150lbs or so that will be in the car.
 Under the bonnet...where the gas tank used to be. Pretty dirty and rusty around the area where the wiper fluid reservoir and brake fluid reservoir sit. I took them out to clean them up. The brake fluid reservoir had a loose cap, (the original) that had just fallen off, so a lot of fluid had leaked all over there. Got a new cap for that, and getting some new flexi line for the fluid. You should see this area now, in the 'after' pics. Really looks great.

Here's the passenger side rear shocks I put in. Coil overs (it still had the original shocks!) to support the extra 150lbs or so that will be in the car.
Here's one of the front shocks in there - these were quite difficult to get in there. Had to use a 2nd floor jack to compress the shock to get it in there. Is there a better way? Probably, but I did it this way...
 Under the bonnet...where the gas tank used to be. Pretty dirty and rusty around the area where the wiper fluid reservoir and brake fluid reservoir sit. I took them out to clean them up. The brake fluid reservoir had a loose cap, (the original) that had just fallen off, so a lot of fluid had leaked all over there. Got a new cap for that, and getting some new flexi line for the fluid. You should see this area now, in the 'after' pics. Really looks great.
The upper part of the bonnet/gas tank area. I sanded it down, and touched it up with some matched Ruby Red paint. Looks great now...check back for the after pics.
I'm gonna put 3 batteries in that area where the tank used to be.
Hopefully a lot work will get done this weekend. Dad is gonna be here for a while, helping out for a week.
Subscribe to:
Posts (Atom)


 Posts
Posts


